The stm32f103c8t6 is a cheap (<$2 US delivered) micro-controller board, similar to Arduino boards. This page summarizes a series of my posts about different ways to get information in or out of these things. One of the biggest, to me, differences between programming a micro controller and a normal PC is that you have to think about how to communicate with other pieces of hardware. There are various ways to do such communication, and hence this series.
Although I’ve programmed professionally for many years, embedded is fairly new to me. Many tutorials are written by seasoned experts who have forgotten about the things that can be confusing to newcomers. Hopefully, my tutorials won’t suffer from that as much.
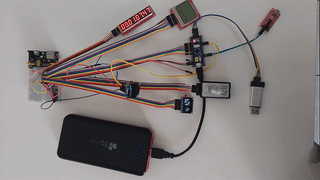
This series talks about 6 different ways to talk to these little stm32 boards. I try to make each post also use the method to do something interesting.
The posts are almost done, not yet published, but here’s the plan:
- Blink an LED, the “hello world” of embedded programming. In order to blink an led, I show
-
- how to generate the machine startup code via STM32CubMX
- where to get the compiler and how to compile your code
- how to use openOCD and an ST-Link programmer to upload the compiled binary to the board
-
- Via GDB. The main thing I don’t like about Arduino is that it depends on printf style debugging. Using a debugger is SOOOOO… much more pleasant. This method is in the UART post/video.
- UART. In the Arduino world this is the serial monitor. In this post, I talk about
- setting up the needed ftdi module
- exchanging messages between your stm32 board and a terminal program like minicom
- UART is a common way for hardware modules to talk to each other. For example, in the quadcopter world, on screen display modules, datalogging, and gps are all communicated to the main board via UART
- SPI. There are many, many, many, hardware devices/chips out there that communicate through SPI. In this post, I talk about how to send SPI messages from the stm32 board. To verify that things are working correctly, I also talk about how to use a cheap and simple logic analyzer module, together with the Sigrok/Pulseview applications to see what’s happening on your module’s pins. Just like I don’t understand how programmers can live without a debugger like GDB, a logic analyzer is also critical.
- I2C. Another common communications protocol is I2C. In this post, I show
- how to work around an erratta in the STM32 I2C implementation
- How to use I2C to talk to a cheap OLED display module.
- How to use the u8g2 library to make it really easy to draw stuff on the display
- As a bonus, I talk about several other display modules: the SPI variant of the oled display, the nokia 5110 based display, as well as a simple 8 digit 7-segment display module.
- USB. The stm32f103 can also speak USB. This post talks about using USB to talk to your device. Very similar as UART except you don’t need to connect any wires. Additionally, I talk about
- How to talk to the CC1101 modules (not via usb)
- How to connect a terminal on Android to your stm32
- all to enable messaging between two phones without paid connectivity. Be prepared for the zombie apocalypse.